読んでる
全体構成
- 1) Front
- Online Store Web
- 2) Spring Cloud Backing Services
- Config Service ←今日はこれ
- Discovery Service
- Edge Service
- User Service
- 3) Backend Microservices
- Catalog Service
- Account Service
- Inventory Service
- Cart Service
- Order Service
早速、昨晩から気分が変わって、Config Serviceのところをちゃんと自分用にまとめておこうと思った。
Config Service
https://github.com/kbastani/spring-cloud-event-sourcing-example/tree/master/config-service
設定を一元管理するサービス。Spring Cloud Config がアノテーション1個で色々やってくれるのでなんかすごいよね。
こんな感じ:
pom.xml
Spring Cloud Config Serverの依存を追加。
<dependency>
  <groupId>org.springframework.cloud</groupId>
  <artifactId>spring-cloud-config-server</artifactId>
</dependency>
bootstrap.yml
bootstrap.yml はSpring Cloud用の設定すね。今回はGithubを設定のリポジトリとして使用してるすね。
server:
  port: 8888
spring:
  application:
    name: config-service
  cloud:
    config:
      server:
        git:
          uri: https://github.com/kbastani/spring-cloud-event-sourcing-config.git
ConfigApplication.java
で、アノテーションを一個追加。
@SpringBootApplication
@EnableConfigServer
public class ConfigApplication {

    public static void main(String[] args) {
        SpringApplication.run(ConfigApplication.class, args);
    }
}
この @EnableConfigServer でConfig Serverが立ち上がる。
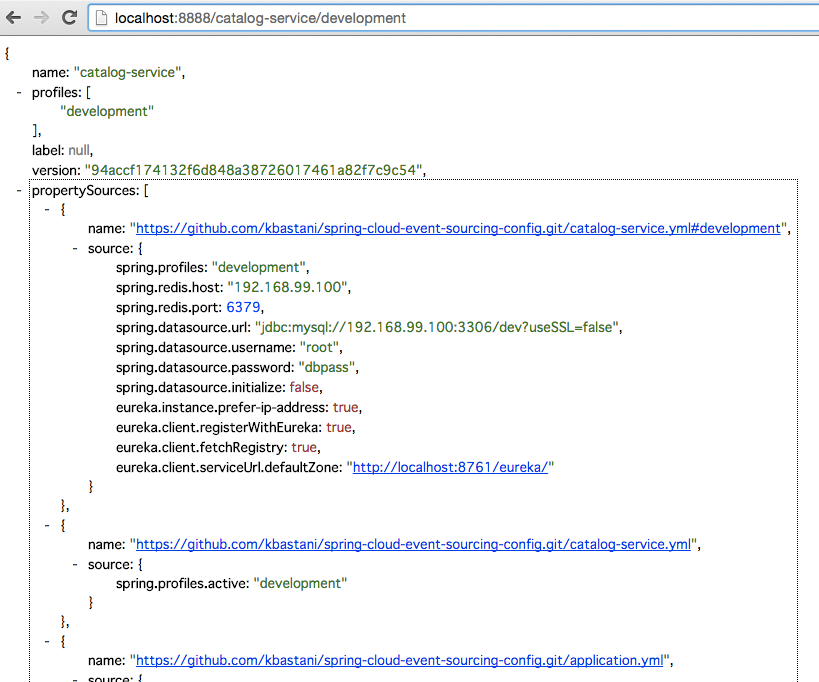
起動したらこんな感じ

使う方は?
使う方は、Spring Cloud Starter Configの依存を追加してbootstrap.ymlにConfig Serverの情報を書くだけ。
pom.xml
<dependency>
  <groupId>org.springframework.cloud</groupId>
  <artifactId>spring-cloud-starter-config</artifactId>
</dependency>
bootstrap.yml
spring:
  profiles: default
  cloud:
    config:
      uri: http://localhost:8888
簡単だなー!
自分でアプリ作るときは、これをどう有効に使うかってのと、中身がどうなってるのかってところを考えていきたい。