The AHA Stack というものを見かけて「なんだろこれ?」と思ったので、ちょこっと触ってみた。
Astro + htmx + Alpine.js のスタックのことらしい。アハ!(これが言いたかっただけ)
この記事の目的を無事に(?)達成したので、あとはおまけ。Astro + htmx の example で遊んでみることにする。
Astro?
Astro 知らなかった。へー。コンテンツ駆動のサーバーファーストな MPA のフレームワークか。面白いな。
とりあえず空のプロジェクトを TypeScript で作ってみた。
❯ pnpm create astro@latest

 astro   Launch sequence initiated.

   dir   Where should we create your new project?
         ./blue-binary

  tmpl   How would you like to start your new project?
         Empty

  deps   Install dependencies?
         Yes

    ts   Do you plan to write TypeScript?
         Yes

   use   How strict should TypeScript be?
         Strict

   git   Initialize a new git repository?
         Yes

      ✔  Project initialized!
         ■ Template copied
         ■ Dependencies installed
         ■ TypeScript customized
         ■ Git initialized

  next   Liftoff confirmed. Explore your project!

         Enter your project directory using cd ./blue-binary
         Run pnpm dev to start the dev server. CTRL+C to stop.
         Add frameworks like react or tailwind using astro add.

         Stuck? Join us at https://astro.build/chat

╭─────╮  Houston:
│ ◠ ◡ ◠  Good luck out there, astronaut! 🚀
╰─────╯
起動してみる。
❯ cd blue-binary

❯ pnpm dev

> blue-binary@0.0.1 dev
> astro dev


 astro  v4.2.1 ready in 80 ms

┃ Local    http://localhost:4321/
┃ Network  use --host to expose

14:07:39 watching for file changes...
14:07:41 [200] / 4ms
いいぞいいぞ
ちょっと触ってみる
src/pages/index.astro がコードっぽい。
---

---

<html lang="en">
  <head>
    <meta charset="utf-8" />
    <link rel="icon" type="image/svg+xml" href="/favicon.svg" />
    <meta name="viewport" content="width=device-width" />
    <meta name="generator" content={Astro.generator} />
    <title>Astro</title>
  </head>
  <body>
    <h1>hello, Astro</h1>
  </body>
</html>
hello, Astro に書き換えてみるか。
  <body>
    <h1>hello, Astro</h1>
  </body>
保存したらすぐ反映されたや。いいぞいいぞ。
The AHA Stack の example をやってみる
書いてあるとおりに書いてみた。
---
import fs from 'node:fs'

try {
  fs.accessSync('/tmp/count.txt')
} catch {
  fs.writeFileSync('/tmp/count.txt', '0')
}

const count = fs.readFileSync('/tmp/count.txt', 'utf-8')
---

<html lang='en'>
  <head>
    <meta charset='utf-8' />
    <link rel='icon' type='image/svg+xml' href='/favicon.svg' />
    <meta name='viewport' content='width=device-width' />
    <meta name='generator' content='{Astro.generator}' />
    <title>Astro</title>
  </head>
  <body>
    <h1>Count: {count}</h1>
  </body>
</html>
へー。--- で区切って、上がコードで下がテンプレートか。なんかちょっと懐かしいような、新しいような。
コードでやってること:ファイルがなかったら作って0を書き込む。
❯ cat /tmp/count.txt
0
テンプレートでやってること:そのファイルに書かれている数字を表示する。
このテンプレートの部分が今はHTMLだから、example に従って htmx を使うようにしてみる。
htmx?
ちょっと聞いたことがある、くらい。JS使わずにHTMLで動的なページを作れるやつ。
また書いてあるとおりに修正して、こんな感じになった。
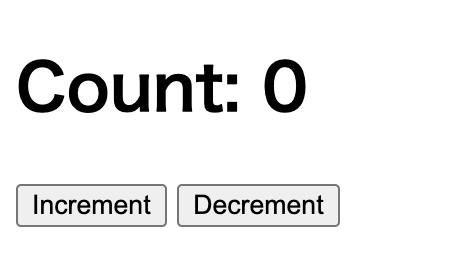
<html lang='en'>
  <head>
    <meta charset='utf-8' />
    <link rel='icon' type='image/svg+xml' href='/favicon.svg' />
    <meta name='viewport' content='width=device-width' />
    <meta name='generator' content='{Astro.generator}' />
    <!-- これを追加 -->
    <script src="https://unpkg.com/htmx.org@1"></script>
    <title>Astro</title>
  </head>
  <body>
    <h1>Count: {count}</h1>

    <!-- この2行を追加 -->
    <button hx-post="/api/increment">Increment</button>
    <button hx-post="/api/decrement">Decrement</button>
  </body>
</html>
雰囲気で読むと、Increment ボタンを押すと POST /api/increment を呼び出すんだろうな。
APIを実装
src/pages/api/increment.astro をこんな風に書くと
---
import fs from 'node:fs'
export const partial = true

const count = +fs.readFileSync('/tmp/count.txt', 'utf-8').trim() + 1
fs.writeFileSync('/tmp/count.txt', count.toString())
---

{count}
叩けた。GET でも POST でもいけそうだなと思ったら、いけた。ふむふむ。
❯ curl localhost:4321/api/increment
1
❯ curl localhost:4321/api/increment
2
❯ curl -X POST localhost:4321/api/increment
3
export const partial = true ってなんだろう?と思ったら、これをつけると HTML の一部分だけを書くことができるらしい。へー。
decrement も作っておいた。
❯ curl localhost:4321/api/decrement
3
❯ curl localhost:4321/api/decrement
2
❯ curl localhost:4321/api/decrement
1
htmx に戻る
API ができたので、htmx に戻ってボタンを押してみる。
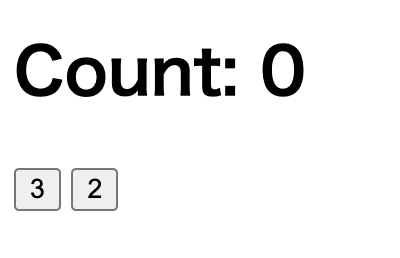
なるほど?Valueをレスポンスで書き換えてるっぽいな。だから、htmx で書き換え先のターゲットを指定する、と。
  <body>
    <h1>
      Count: <span id='count'>{count}</span>
    </h1>

    <button hx-post='/api/increment' hx-target='#count'>
      Increment
    </button>
    <button hx-post='/api/decrement' hx-target='#count'>
      Decrement
    </button>
  </body>
いいぞいいぞ。
API 側から入れ替え先を指定する
ということもできるとのこと。hx-swap-oob='true' を使う。↓こんな風に書くと、count のところを入れ替えられるらしい。
<span id='count' hx-swap-oob='true'>
  {count}
</span>
これを使ったら、サーバー側から複数の場所の入れ替えを指定したりできて良さそうね。
Increment/Decrement ボタンのところには、Value を入れ替えないように hx-swap='none' の指定が必要とのこと。
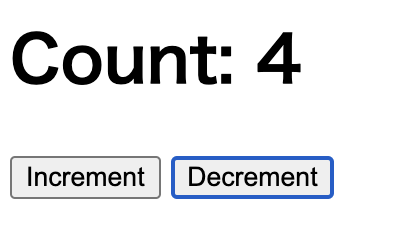
最終的には
こんな感じになった。
src/pages/index.astro
---
import fs from 'node:fs'

try {
  fs.accessSync('/tmp/count.txt')
} catch {
  fs.writeFileSync('/tmp/count.txt', '0')
}

const count = fs.readFileSync('/tmp/count.txt', 'utf-8')
---

<html lang='en'>
  <head>
    <meta charset='utf-8' />
    <link rel='icon' type='image/svg+xml' href='/favicon.svg' />
    <meta name='viewport' content='width=device-width' />
    <meta name='generator' content='{Astro.generator}' />
    <script src="https://unpkg.com/htmx.org@1"></script>
    <title>Astro</title>
  </head>
  <body>
    <h1>
      Count: <span id='count'>{count}</span>
    </h1>

    <button hx-post='/api/increment' hx-swap='none'>
      Increment
    </button>
    <button hx-post='/api/decrement' hx-swap='none'>
      Decrement
    </button>
  </body>
</html>
src/pages/api/increment.astro
---
import fs from 'node:fs'
export const partial = true

const count = +fs.readFileSync('/tmp/count.txt', 'utf-8').trim() + 1
fs.writeFileSync('/tmp/count.txt', count.toString())
---

<span id='count' hx-swap-oob='true'>
  {count}
</span>
src/pages/api/decrement.astro
---
import fs from 'node:fs'
export const partial = true

const count = +fs.readFileSync('/tmp/count.txt', 'utf-8').trim() - 1
fs.writeFileSync('/tmp/count.txt', count.toString())
---

<span id='count' hx-swap-oob='true'>
  {count}
</span>
おわり
面白かった。Astro と htmx はサクサク作れて便利ね。今回は Alpine.js は触ってないのでまたいつか機会があればってことで。